Safari Ball
Safari Ball 3D model
Back to the 3D Poké Ball viewer
More modern Poké Balls in 3D
Poké Ball 3D model · Great Ball 3D model · Ultra Ball 3D model · Master Ball 3D model · Premier Ball 3D model · Heal Ball 3D model · Net Ball 3D model · Nest Ball 3D model · Dive Ball 3D model · Dusk Ball 3D model · Strange Ball 3D model · Timer Ball 3D model · Quick Ball 3D model · Repeat Ball 3D model · Luxury Ball 3D model · Fast Ball 3D model · Friend Ball 3D model · Lure Ball 3D model · Level Ball 3D model · Heavy Ball 3D model · Cherish Ball 3D model · Love Ball 3D model · Moon Ball 3D model · Dream Ball 3D model · Beast Ball 3D model · Sport Ball 3D model · GS Ball 3D model
Where to find it
No covered game’s map records where to get this item yet.
Pokémon that match the Safari Ball
125 Pokémon list the Safari Ball as a colour match for their normal or shiny form.
- Squirtle ball guide
- Wartortle ball guide
- Blastoise ball guide
- Pidgey ball guide
- Rattata ball guide
- Raticate ball guide
- Spearow ball guide
- Fearow ball guide
Browse every Pokémon matching the Safari Ball
Browse Poké Balls
Poké Ball · Great Ball · Ultra Ball · Master Ball · Premier Ball · Heal Ball · Net Ball · Nest Ball · Dive Ball · Dusk Ball · Strange Ball · Timer Ball · Quick Ball · Repeat Ball · Luxury Ball · Safari Ball · Fast Ball · Friend Ball · Lure Ball · Level Ball · Heavy Ball · Cherish Ball · Love Ball · Moon Ball · Dream Ball · Beast Ball · Sport Ball
Tries to catch a wild Pokémon in the Great Marsh or Safari Zone. Success rate is 1.5×.
Category: standard balls
Effect notes
Used in battle : Attempts to catch a wild Pokémon, using a catch rate of 1.5×. This item can only be used in the Great Marsh or Safari Zone.
In-game descriptions by version
| ruby sapphire | A special BALL that is used only in the SAFARI ZONE. |
|---|---|
| emerald | A special BALL that is used only in the SAFARI ZONE. |
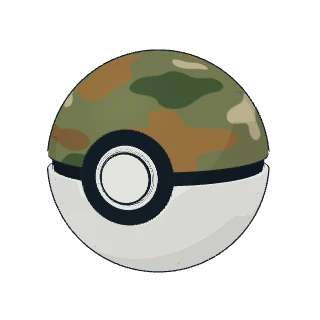
| firered leafgreen | A special BALL that is used only in the SAFARI ZONE. It is finished in a camouflage pattern. |
| diamond pearl | A special Poké Ball that is used only in the Great Marsh. It is decorated in a camouflage pattern. |
| platinum | A special Poké Ball that is used only in the Great Marsh. It is decorated in a camouflage pattern. |
| heartgold soulsilver | A special Poké Ball that is used only in the Great Marsh. It is decorated in a camouflage pattern. |
| black white | A special Poké Ball that is used only in the Great Marsh. It is decorated in a camouflage pattern. |
| black 2 white 2 | A special Poké Ball that is used only in the Great Marsh. It is decorated in a camouflage pattern. |
| x y | A special Poké Ball that is used only in the Great Marsh. It is recognizable by the camouflage pattern decorating it. |
| sun moon | A special Poké Ball that is used only in the Great Marsh. It is recognizable by the camouflage pattern decorating it. |
| ultra sun ultra moon | A special Poké Ball that is used only in the Great Marsh. It is recognizable by the camouflage pattern decorating it. |
| lets go pikachu lets go eevee | - - - |
| sword shield | A special Poké Ball that was used in the Safari Zone in the Kanto region and in the Great Marsh in the Sinnoh region. |
Catch rate
Safari Ball: ×1 — the same odds as a Poké Ball (Sword / Shield, Generation IX).
Older games differ — the table shows each one.
| Games | Effect |
|---|---|
| Sword / Shield, Generation IX | ×1 the same odds as a Poké Ball |
| Generation III and IV | ×1.5 only in the Safari Zone |
| Generation I | No multiplier only in the Safari Zone; rolls its first random number from 0 to 150 instead of 0 to 255 |
Games that catch outside battle — Let’s Go, Legends: Arceus and Legends: Z-A — use their own systems and are not listed.
How the game calculates it
Generation V to IX
The game multiplies the HP the Pokémon has lost (3 × max HP M minus 2 × current HP H, over 3 × max HP) by its catch rate C, the ball’s multiplier B and the status bonus S (×2.5 asleep or frozen, ×1.5 paralysed, burned or poisoned). If X reaches 255 the Pokémon is caught. Otherwise the ball shakes: each shake passes with the chance Y ÷ 65536, and all four must pass, so the chance P is roughly (X ÷ 255) to the power ¾. Generation V uses the power ¼ and three shakes; later games add a few extra factors to X, such as low-level and badge bonuses.
For the Safari Ball, B is ×1 (see the table above).
Generation III and IV
The same idea in whole numbers, rounded down at every step: lost HP times catch rate C times the ball’s multiplier B, then the status bonus S (×2 asleep or frozen, ×1.5 paralysed, burned or poisoned). At 255 or more the Pokémon is caught; otherwise four shakes must each pass with the chance Y ÷ 65536, which works out to almost exactly X ÷ 255. So in these games a ×2 ball really does double your chance.
For the Safari Ball, B is ×1.5 (see the table above).
Generation I
Red, Blue and Yellow have no multiplier. The ball sets how large the first random number R1 can be (N = 256 for the Poké Ball, 201 for the Great Ball, 151 for the Ultra and Safari Balls) and the factor F in the HP check (8 for the Great Ball, 12 for the others). R1 below the status value (25 asleep or frozen, 12 paralysed, burned or poisoned) catches at once; R1 minus that value above the catch rate fails; otherwise a second random number from 0 to 255 catches when it is W or lower.
The Safari Ball rolls its first random number from 0 to 150 instead of 0 to 255.
What changed between generations
- Generation I: no multiplier — the ball limits the first random number and sets the HP factor.
- Generation II: the ball changes the catch rate itself; one random number decides.
- Generation III and IV: the ball becomes a separate multiplier, and four shakes decide.
- Generation V: fractions in steps of 1/4096, three shakes, critical captures and dark grass.
- Generation VI to IX: four shakes again; later games add low-level, badge and difficulty factors.