How to Unlock the Regis in Ruby, Sapphire & Emerald
Wailord first or Relicanth first? The Route 134 dive, the Sealed Chamber braille and all three Regi doors — with exact steps for R/S and Emerald.
Published
The three legendary golems — Regirock, Regice and Registeel — sit behind the only puzzle in Ruby, Sapphire and Emerald that the games refuse to translate for you. Their instructions are carved in braille, printed on cave walls as bare patterns of dots, and no NPC ever reads them aloud. This guide gives you the decoder chart the games only ever shipped on a paper insert, every wall message transcribed, and the exact solution for each of the four chambers.
- Game
- Ruby Sapphire Emerald — door solutions and party order differ
- You need
- Surf and Dive to reach the chamber, Dig (TM28) to open its inner room, Strength or Rock Smash at Desert Ruins, Fly or Flash at Ancient Tomb — plus Relicanth and Wailord in the party
- Where
- The Sealed Chamber under Route 134, then Desert Ruins, Island Cave and Ancient Tomb
- Reward
- Regirock, Regice and Registeel — static level 40 encounters
The braille alphabet, and how to read a wall
Every instruction in this puzzle is uncontracted English braille: a two-by-three grid of dots per character, only the raised dots drawn. Game Freak never put a translation in the games. Japanese, Australian and European copies shipped a decoder chart — a paper insert, or pages 60–61 of the Trainer’s Guide — and North American copies shipped none at all, just a Trainer Tip suggesting you phone Nintendo. That is the chart below.
Read one cell top-to-bottom, left column first: positions 1, 2, 3 down the left, 4, 5, 6 down the right. A gap between groups is a word space.
- ⠁⠃⠉⠙⠑⠋⠛⠓⠊⠚⠅⠇⠍⠝⠕⠏⠟⠗⠎⠞⠥⠧⠺⠭⠽⠵⠲⠂ abcdefghijklmnopqrstuvwxyz.,
Tip — You never have to decode a wall to finish the puzzle: Every message in this guide is already transcribed below, so the chart is there for the pleasure of reading a wall yourself before you scroll. In-game the walls are read with the A button while facing them, exactly like a sign.
What you need before you start
- Surf and Dive Surf carries you along Route 134; Dive takes you under it and back up inside the chamber. Both are HMs — Surf from Wally’s father in Petalburg, Dive from Steven at his house in Mossdeep City.
- Dig — TM28, not an HM The inner door of the Sealed Chamber opens with Dig, which in Gen 3 is a TM: TM28, found on Route 114 near Fallarbor Town. It is the one field move here that no HM slot covers, and the step most players get stuck on.
- Strength, Rock Smash, Fly and Flash for the three caves Desert Ruins wants Strength in Ruby and Sapphire, Rock Smash in Emerald. Ancient Tomb wants Fly in Ruby and Sapphire, Flash in Emerald. Island Cave needs no move at all.
- Relicanth Catch a Relicanth underwater on Route 124 or Route 126 — it is a rare underwater encounter; check its location page for the exact spots.
- Wailord Bring a Wailord by evolving Wailmer at level 40, or catch one while surfing Route 129.
Do you really need Wailord and Relicanth?
Yes — and it is worth saying plainly, because it sounds like a rumour. Relicanth and Wailord are a hard-coded requirement, not a superstition and not an optional shortcut. The game checks your party the moment you read the inner chamber’s last wall: if the first and last slots do not hold those two species, nothing happens and no message tells you why.
The choice is deliberate flavour. Relicanth is Hoenn’s living fossil, unchanged for a hundred million years, and Wailord is the largest Pokémon in the game — the oldest and the biggest, the two witnesses the ancient people would have trusted to reopen their door. The wall says so itself: it names both by name.
Warning — Set the party order for your version — Emerald reverses it: Ruby and Sapphire want Relicanth in the first slot and Wailord in the last. Emerald swaps them: Wailord first, Relicanth last. Anything else, including the right pair in the wrong slots, simply does nothing. Both species may hold any level and any other party member may fill the slots between them.
Opening the Sealed Chamber
The Sealed Chamber is three rooms deep: an underwater passage, an outer room carved with the alphabet, and an inner room holding the story and the party rule. Nothing in it can be missed permanently — you may leave and come back as often as you like.
Step 1 — find the dive spot on Route 134
Surf out onto Route 134 and let the westward currents carry you. The dive spot is a patch of darker water tucked into a pocket the currents sweep you past; you cannot paddle straight to it against the flow, so ride the current into the pocket and use Dive there.
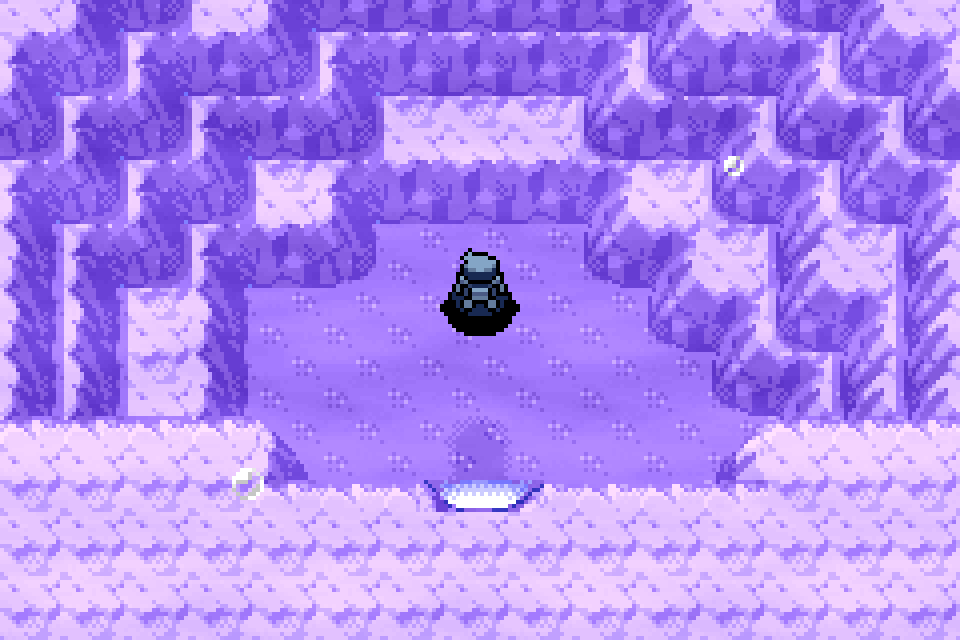
Step 2 — surface at the braille rock
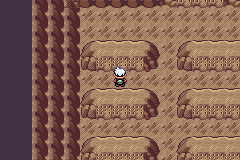
Underwater, follow the corridor of seaweed north-east until it opens into a small dead end. The rock at the end carries two words of braille, and they are an instruction: this is the one tile where surfacing puts you inside the chamber rather than back on the route.
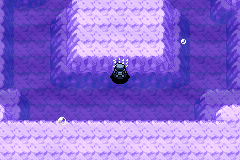
Underwater — the rock at the end of the passage
- ⠛⠕⠀⠥⠏⠀⠓⠑⠗⠑⠲ GO UP HERE.
Use Dive again on this exact tile to surface. Anywhere else and you come up on the open route.
Step 3 — use Dig on the outer room’s back wall
The outer room is the alphabet room: the mounds along its floor spell out A to Z with the full stop and comma, and they are a reference, not a clue — the developers put the paper insert’s chart into the game itself. Walk past them to the very back wall, which carries the actual instruction, and use Dig while facing it. A doorway grinds open.
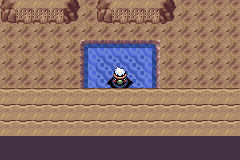
Outer room — the back wall
- ⠙⠊⠛⠀⠓⠑⠗⠑⠲ DIG HERE.
Face the wall and use Dig from the menu. Using it anywhere else in the room does nothing and costs no PP.
Step 4 — read the inner room with the right party
The inner room holds two walls. The long one tells you who sealed the Pokémon away and why; the short one is the key. Read the short wall with Relicanth and Wailord in their version’s slots, and Hoenn shakes with an earthquake — that rumble is all three cave doors opening at once, and it is the only confirmation the game gives you.
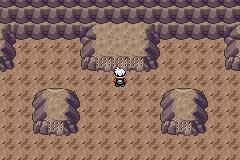
Inner room — the story wall
- ⠊⠝⠀⠞⠓⠊⠎⠀⠉⠁⠧⠑⠀⠺⠑⠀⠓⠁⠧⠑⠀⠇⠊⠧⠑⠙⠲ IN THIS CAVE WE HAVE LIVED.
- ⠺⠑⠀⠕⠺⠑⠀⠁⠇⠇⠀⠞⠕⠀⠞⠓⠑⠀⠏⠕⠅⠑⠍⠕⠝⠲ WE OWE ALL TO THE POKEMON.
- ⠃⠥⠞⠂⠀⠺⠑⠀⠎⠑⠁⠇⠑⠙⠀⠞⠓⠑⠀⠏⠕⠅⠑⠍⠕⠝⠀⠁⠺⠁⠽⠲ BUT, WE SEALED THE POKEMON AWAY.
- ⠺⠑⠀⠋⠑⠁⠗⠑⠙⠀⠊⠞⠲ WE FEARED IT.
- ⠞⠓⠕⠎⠑⠀⠺⠊⠞⠓⠀⠉⠕⠥⠗⠁⠛⠑⠂⠀⠞⠓⠕⠎⠑⠀⠺⠊⠞⠓⠀⠓⠕⠏⠑⠲ THOSE WITH COURAGE, THOSE WITH HOPE.
- ⠕⠏⠑⠝⠀⠁⠀⠙⠕⠕⠗⠲⠀⠁⠝⠀⠑⠞⠑⠗⠝⠁⠇⠀⠏⠕⠅⠑⠍⠕⠝⠀⠺⠁⠊⠞⠎⠲ OPEN A DOOR. AN ETERNAL POKEMON WAITS.
Inner room — the key wall (Ruby and Sapphire)
- ⠋⠊⠗⠎⠞⠀⠉⠕⠍⠑⠎⠀⠗⠑⠇⠊⠉⠁⠝⠞⠓⠲⠀⠇⠁⠎⠞⠀⠉⠕⠍⠑⠎⠀⠺⠁⠊⠇⠕⠗⠙⠲ FIRST COMES RELICANTH. LAST COMES WAILORD.
Inner room — the key wall (Emerald)
- ⠋⠊⠗⠎⠞⠀⠉⠕⠍⠑⠎⠀⠺⠁⠊⠇⠕⠗⠙⠲⠀⠇⠁⠎⠞⠀⠉⠕⠍⠑⠎⠀⠗⠑⠇⠊⠉⠁⠝⠞⠓⠲ FIRST COMES WAILORD. LAST COMES RELICANTH.
Note — No earthquake? Check the party, not the wall: If reading the key wall produces nothing at all, the party order is wrong for your version — that is the only failure mode. The wall itself never refuses you and never shows an error, which is exactly why this step has a reputation.
The three caves, one door each
The earthquake opens all three caves at the same time, so you may visit them in any order. Each one holds a single braille wall and a mini-puzzle performed in the room itself, and every one of the three solutions was rewritten for Emerald. The three chambers are the same room — same 17×33 layout, same tileset, same carved stones — so the golem standing in it is the only thing that tells them apart. All three are static level 40 encounters, and each one is pictured in its own section below.
- Regirock — Rock, level 40, waiting in Desert Ruins in the Route 111 desert.
- Regice — Ice, level 40, waiting in Island Cave on the island off Route 105.
- Registeel — Steel, level 40, waiting in Ancient Tomb on Route 120.
| Cave and encounter | Where | Ruby / Sapphire | Emerald |
|---|---|---|---|
| Desert Ruins — Regirock | Route 111 desert | Two steps right, two down, then Strength | Two steps left, two down, then Rock Smash |
| Island Cave — Regice | Route 105 island | Stand still for about two minutes | Run one lap hugging the cave wall |
| Ancient Tomb — Registeel | Route 120 | Stand in the middle and use Fly | Stand in the middle and use Flash |
Desert Ruins — Regirock
The ruins stand in the sandstorm section of the Route 111 desert, so bring the Go-Goggles. Inside, stand directly on the tile in front of the braille wall and count from there: two steps sideways, then two steps down, then use the move from the menu while standing on that spot. Facing does not matter; the tile does.
Desert Ruins (Ruby and Sapphire)
- ⠗⠊⠛⠓⠞⠂⠀⠗⠊⠛⠓⠞⠂ RIGHT, RIGHT,
- ⠙⠕⠺⠝⠂⠀⠙⠕⠺⠝⠲ DOWN, DOWN.
- ⠞⠓⠑⠝⠂⠀⠥⠎⠑ THEN, USE
- ⠎⠞⠗⠑⠝⠛⠞⠓⠲ STRENGTH.
Desert Ruins (Emerald)
- ⠇⠑⠋⠞⠂⠀⠇⠑⠋⠞⠂ LEFT, LEFT,
- ⠙⠕⠺⠝⠂⠀⠙⠕⠺⠝⠲ DOWN, DOWN.
- ⠞⠓⠑⠝⠂⠀⠥⠎⠑ THEN, USE
- ⠗⠕⠉⠅⠀⠎⠍⠁⠎⠓⠲ ROCK SMASH.
Emerald mirrors the direction and swaps the move — following a Ruby walkthrough in Emerald puts you two tiles off the mark and on the wrong move.
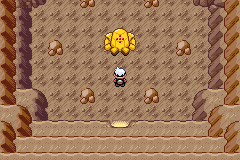
Island Cave — Regice
Surf north-west from Dewford Town along Route 105 to the small island with a cave mouth. This is the one chamber whose answer is not a move: in Ruby and Sapphire you stand perfectly still for two full minutes — no menus, no turning — and in Emerald you instead run one complete lap around the room hugging the wall.
Island Cave (Ruby and Sapphire)
- ⠎⠞⠕⠏⠀⠁⠝⠙ STOP AND
- ⠺⠁⠊⠞⠲⠀⠺⠁⠊⠞ WAIT. WAIT
- ⠋⠕⠗⠀⠞⠊⠍⠑⠀⠞⠕ FOR TIME TO
- ⠏⠁⠎⠎⠀⠞⠺⠊⠉⠑⠲ PASS TWICE.
“Twice” is two minutes on the game clock. Put the console down; a single step restarts the count.
Island Cave (Emerald)
- ⠎⠞⠁⠽⠀⠉⠇⠕⠎⠑ STAY CLOSE
- ⠞⠕⠀⠞⠓⠑⠀⠺⠁⠇⠇⠲ TO THE WALL.
- ⠗⠥⠝⠀⠁⠗⠕⠥⠝⠙ RUN AROUND
- ⠕⠝⠑⠀⠇⠁⠏⠲ ONE LAP.
Running Shoes on, one continuous circuit along the outer wall, back to where you started.
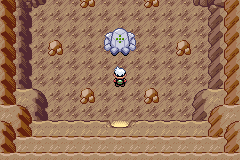
Ancient Tomb — Registeel
The tomb is tucked behind the tall grass of Route 120, north of the Fortree side. Stand on the centre tile of the room — the one directly in line with the braille wall — and use the move from the menu. Ruby and Sapphire want Fly, which cannot leave the room and instead triggers the door; Emerald wants Flash.
Ancient Tomb (Ruby and Sapphire)
- ⠺⠊⠞⠓⠀⠝⠑⠺⠀⠞⠊⠍⠑⠂ WITH NEW TIME,
- ⠓⠕⠏⠑⠀⠁⠝⠙⠀⠇⠕⠧⠑⠂ HOPE AND LOVE,
- ⠁⠊⠍⠀⠞⠕⠀⠞⠓⠑⠀⠎⠅⠽ AIM TO THE SKY
- ⠊⠝⠀⠞⠓⠑⠀⠍⠊⠙⠙⠇⠑⠲ IN THE MIDDLE.
“Aim to the sky” is Fly. “In the middle” is the centre tile, literally.
Ancient Tomb (Emerald)
- ⠞⠓⠕⠎⠑⠀⠺⠓⠕ THOSE WHO
- ⠊⠝⠓⠑⠗⠊⠞⠀⠕⠥⠗ INHERIT OUR
- ⠺⠊⠇⠇⠂⠀⠎⠓⠊⠝⠑ WILL, SHINE
- ⠊⠝⠀⠞⠓⠑⠀⠍⠊⠙⠙⠇⠑⠲ IN THE MIDDLE.
“Shine” is Flash — the same centre tile, a different move.
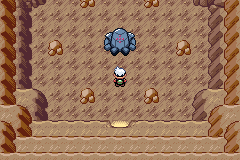
Warning — Save in front of each golem before you battle: In Emerald a golem you flee from or knock out returns when you leave and re-enter the room. Ruby and Sapphire have no such safety net: a fainted Regi is gone from that save file for good. Save on the tile in front of the door, every time.
All three are level 40 with high defences and Superpower, so a Timer Ball beats an early Ultra Ball. For colour-matching catches, these are the golems’ matching balls from Gen 3’s own lineup.
Regirock, Regice and Registeel: quick answers
- Do I really need Wailord and Relicanth?
- Yes. The inner chamber wall names both species, and the game checks the first and last party slots when you read it. There is no alternative method and no item that replaces them.
- Where was the braille chart in the manual?
- On a loose insert in Japanese and Australian copies, and on pages 60–61 of the European Trainer’s Guide. North American copies shipped without one. The chart above is the same alphabet.
- Is Dig an HM?
- No — in Gen 3 Dig is TM28. It is the only field move in this puzzle that is not an HM, which is why so many players arrive at the Sealed Chamber unable to open the inner room.
- Can I catch the three Regis in any order?
- Yes. The Sealed Chamber earthquake opens all three caves at once.
- Do I need Wailord and Relicanth again afterwards?
- No. Their party positions matter only when reading the inner chamber wall.
- Why do my braille steps do nothing?
- You are following the other version’s solution. Every one of the three cave puzzles changed between Ruby/Sapphire and Emerald, and so did the party order.
- What levels are Regirock, Regice and Registeel?
- All three are level 40 in Ruby, Sapphire and Emerald.