Pokémon EV Training Guide: Effort Values & Best Spots
What Effort Values do, how the 510 and 252 caps work, and the fastest EV training spot for every stat in Generations 3 to 9.
Published · Updated
EV training means choosing which wild Pokémon you defeat, so your Pokémon grows stronger in the stats you pick. Every defeat leaves a few hidden points called Effort Values (EVs); 252 of them in one stat make that stat 63 points higher at level 100.
- Applies to
- Generation 3 onwards — Ruby Sapphire Emerald through Scarlet Violet
- The caps
- 510 EVs per Pokémon; 252 usable in a single stat (255 stored in Gen 3–5)
- The exchange rate
- 4 EVs = 1 stat point at level 100, so 252 EVs = +63
- You want
- Macho Brace, a Power item, Pokérus, and the EV-lowering berries for mistakes
| Short form | Stands for | What it means |
|---|---|---|
| EV | Effort Value | Training points earned by defeating Pokémon. You choose them. |
| IV | Individual Value | Hidden talent from 0 to 31 per stat, fixed when you catch or hatch it. |
| HP | Hit Points | How much damage it can take. |
| Sp. Atk | Special Attack | Power of special moves such as Surf or Thunderbolt. |
| Sp. Def | Special Defense | Resistance to special moves. |
| Gen | Generation | A group of games with the same rules. Gen 3 includes Ruby, Sapphire and Emerald. |
Game short forms such as RSE or SV are listed in the Pokémon game abbreviations guide.
What Effort Values are, and how many EV points a Pokémon gives
Every Pokémon gives a fixed number of EVs to whatever defeats it, always in the same stat. Geodude gives 1 Defense. Marill gives 2 HP. Blissey gives 3 HP. Your Pokémon keeps those points forever. Every 4 EVs in one stat add 1 point to that stat at level 100, so EV training is simply: defeat the right Pokémon, many times.
EVs are not the only difference between two Pokémon of the same species, level and nature. IVs, the hidden talent fixed at capture, add up to 31 more points per stat at level 100. You cannot train IVs, but you can train EVs, which is why this guide is about them.
Every Pokémon page on PokéMaps prints its own yield under the base-stat bars, so Bulbasaur's page answers "what does it train?" in one line: 1 Sp. Atk.
| Limit | Value | What it means in play |
|---|---|---|
| Total EVs | 510 | Two stats can be maxed (252 + 252) with 6 left over. A third stat is always a compromise. |
| Per stat | 252 usable | Generations 3–5 store up to 255, but 253, 254 and 255 buy nothing — the remainder is thrown away by the divide-by-four. Generation 6 onwards refuses the 253rd outright. |
| Exchange rate | 4 EVs = 1 point | At level 100. At level 50 the same 252 EVs are worth about +31, so a competitive level-50 build still wants the full spread. |
A spread you can copy: 252 / 252 / 4
Pick the two stats your Pokémon uses most and fill each to 252. A fast attacker takes 252 Attack and 252 Speed; the last 4 go into HP. That is 508 of the 510 EVs. The final 2 cannot reach the next multiple of 4, so they would buy nothing anywhere.
How long does that take? Each Marill gives 2 HP EVs. The Macho Brace doubles that to 4, Pokérus doubles it again to 8, and 10 HP Up bought first cover the first 100 EVs.
| Macho Brace | Pokérus | HP Up first | Marill to defeat |
|---|---|---|---|
| No | No | 126 | |
| Yes | No | 63 | |
| Yes | Yes | 32 | |
| Yes | Yes | 10 HP Up | 19 |
The stat screen does not always change straight away. In Gen 3 and Gen 4 the new EVs show up when the Pokémon levels up, or when you put it in the PC and take it out again. From Gen 5 the stats update right after each battle. Either way, no EV is lost while you wait.
Warning — Generations 1 and 2 do not have EVs: Red, Blue, Yellow, Gold, Silver and Crystal use Stat Experience instead: defeating a Pokémon adds its whole base stat to yours, up to 65,535 per stat. There is no 510 budget and no split, so one Pokémon can max every stat at once. Vitamins stop working on a stat once it holds 25,600 Stat Experience — battles keep paying well past that, which is why a Gen 1–2 "EV spot" is simply the strongest legal opponent you can beat over and over: Chansey (250 base HP) in Cerulean Cave and the Kanto Safari Zone in Red and Blue, and on Kanto Routes 13, 14 and 15 in Gold, Silver and Crystal.
The multipliers: how to go four times faster
Raw route grinding is the slowest way to fill 252 EVs. Everything below stacks, and stacking all of it turns a 2-EV Pokémon into an 8-EV or 12-EV Pokémon per battle.
| Tool | Effect | From |
|---|---|---|
| Macho Brace | Doubles all EVs gained; halves Speed while held | Generation 3 |
| Power Weight | +4 EVs in one fixed stat per battle (+8 from Generation 7), on top of what the opponent gives. The holder’s Speed is halved while it holds one. | Generation 4 |
| Power Bracer | ||
| Power Belt | ||
| Power Lens | ||
| Power Band | ||
| Power Anklet | ||
| Pokérus | Doubles the EVs earned from battles, and keeps doing so after it is cured. Works on top of a held item, so Pokérus plus Macho Brace is ×4. Details below. | Generation 2 |
| HP Up | +10 EVs each. Generations 3–7 refuse them once that stat has 100 EVs; Generation 8 onwards lets them fill all 252, which makes buying the spread the fastest route of all. Pokérus does not double them. | Generation 3 |
| Protein | ||
| Iron | ||
| Calcium | ||
| Zinc | ||
| Carbos | ||
| Exp. Share | In Ruby, Sapphire and Emerald the holder gets the full EV yield without battling. From Generation 6 the party-wide Exp. Share hands it to every party member — convenient for training six at once, ruinous when you only wanted to train one. | Generation 3 |
Tip — Order of operations: Infect with Pokérus first, then hand over the Power item, then farm. EVs already banked are not retroactively doubled — a Pokémon that got to 200 EVs before catching Pokérus keeps those 200 as they are.
Pokérus: what it does, and how to keep it
Pokérus is a harmless virus that a Pokémon very rarely catches from a wild battle. From Gen 3 the summary screen shows it: a “PKRS” mark while it is active, and a small face once it is cured.
| State | Doubles battle EVs | Infects party neighbours |
|---|---|---|
| Active (PKRS) | Yes | Yes |
| Cured (face) | Yes | No |
- It doubles battle EVs only The EVs from a defeated Pokémon are doubled, together with the Power item bonus in Gen 4 onwards. Vitamins and other items that give EVs directly are not doubled.
- It spreads after battles After a battle, an active carrier has a 1 in 3 chance to infect the Pokémon in the party slots directly above and below it. Put the Pokémon you want to train next to the carrier.
- It wears off, but the bonus stays An active infection ends after 1 to 4 days, at midnight on the game clock. The cured Pokémon keeps the double EVs for good, but can no longer infect others and cannot catch it again.
- Keep one carrier in the PC The countdown only runs for Pokémon in your party. Store one active carrier in the PC, and take it out whenever a new Pokémon needs infecting.
Note — Not in every game: Pokérus is in every main game from Gen 2 up to Sword, Shield, Brilliant Diamond and Shining Pearl. Let’s Go, Pikachu!, Let’s Go, Eevee!, Legends: Arceus, Scarlet and Violet do not have it.
Generation 3 — Ruby, Sapphire, Emerald
The generation that invented EVs. Power items do not exist yet, so the Macho Brace is the only held multiplier; Victoria hands it over in the Winstrate family’s house on Route 111 in all three games. Each pool below is counted from that game’s own encounter table. Five pay nothing but the row’s stat; the Sp. Atk row names what to run from.
| Stat | Where | Fight | EVs each |
|---|---|---|---|
| HP | Petalburg City — Surf | Marill | +2 |
| Attack | Route 118 — Super Rod | Carvanha | +1 |
| Sharpedo | +2 | ||
| Defense | Victory Road B1F — Rock Smash | Geodude | +1 |
| Graveler | +2 | ||
| Sp. Atk | Emerald Route 113 — grass | Spinda | +1 |
| Slugma | +1 | ||
| Ruby Route 112 — grass | Numel | +1 | |
| Sapphire Route 112 — grass | Numel | +1 | |
| Sp. Def | Abandoned Ship B1F rooms — Super Rod | Tentacool | +1 |
| Tentacruel | +2 | ||
| Abandoned Ship B1F rooms — Surf | Tentacool | +1 | |
| Tentacruel | +2 | ||
| Speed | Victory Road B2F — Surf | Golbat | +2 |
| Stat | Tip |
|---|---|
| HP | Marill is the entire surf pool |
| Attack | Nothing else bites |
| Defense | Every Rock Smash encounter there is one of the two; in Emerald, every Magma Hideout cave encounter pays Defense too |
| Sp. Atk | On Route 113, run from Skarmory (5%, Defense) |
| Sp. Atk | On Route 112, run from Machop (25%, Attack) |
| Sp. Def | Super Rod and Surf find nothing else; the Old and Good Rods add Magikarp (Speed) |
| Speed | The surf pool is Golbat only |
Each spot below says what you need to get there. Select a picture or a map to open the place on the Hoenn map.
HP: Surf in Petalburg City
Surf on the water in Petalburg City. Every Pokémon you meet on the water is Marill. You need Surf, which Wally’s father gives you in Petalburg after you beat Norman.
Attack: Super Rod on the Route 118 river
Fish with the Super Rod anywhere on the river of Route 118, from the bank or while surfing. Only Carvanha and Sharpedo bite. The Super Rod comes from the fisherman in Mossdeep City.
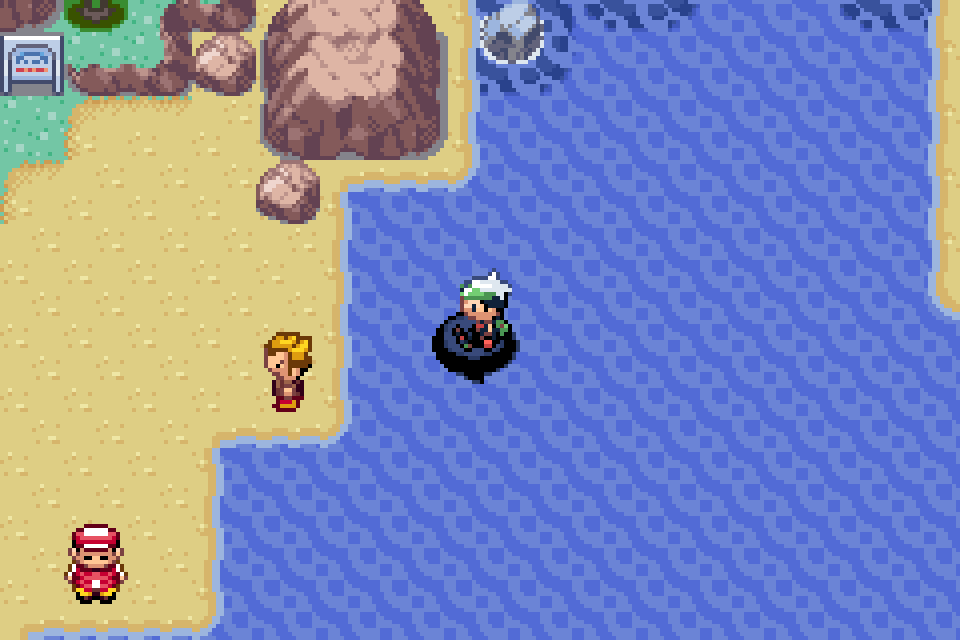
Defense: Rock Smash in Victory Road
Smash the cracked rocks on B1F of Victory Road. Every Pokémon that jumps out is Geodude or Graveler. You reach Victory Road after the eighth badge.
Sp. Atk: the ash grass of Route 113 (Emerald)
In Emerald, walk the ash-covered grass of Route 113. Spinda and Slugma pay Sp. Atk; run from Skarmory. In Ruby and Sapphire, use the grass of Route 112 instead and fight only Numel. No HM is needed for either.
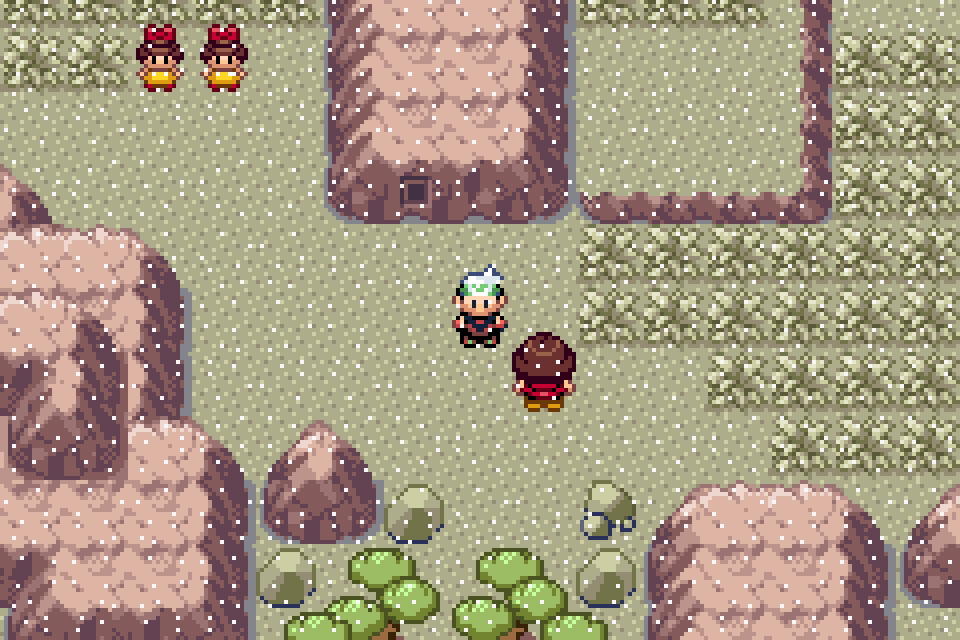
Sp. Def: the flooded rooms of the Abandoned Ship
Go down to the flooded B1F rooms of the Abandoned Ship and Surf or use the Super Rod there. Only Tentacool and Tentacruel appear. You need Surf to reach the ship on Route 108. The Abandoned Ship guide shows the way down.
Speed: Surf on Victory Road B2F
Surf on the water of Victory Road B2F, its lowest floor, in the same cave as the Defense spot. Every Pokémon on the water is Golbat.
Gen 3 extras: Macho Brace location, vitamins and the Effort Ribbon
- Get the Macho Brace Beat all four Winstrates in their house on Route 111, north of Mauville. Victoria then gives you the Macho Brace. It doubles battle EVs but halves Speed while held.
Route 111, home of the Winstrate family. Open the live map for the house. - Buy vitamins in Slateport The Energy Guru at the market stalls in Slateport City sells HP Up, Protein, Iron, Calcium, Zinc and Carbos. Each gives +10 EVs, and they stop working once that stat has 100 EVs. Use them first: 10 of one vitamin cover the first 100 EVs.
- Check your work with the Effort Ribbon The woman standing next to the Energy Guru looks at the first Pokémon in your party. If it holds all 510 EVs, she gives it the Effort Ribbon. The ribbon only proves the total is full. It does not prove the EVs went into the right stats.
Slateport City. The market stalls with the Energy Guru and the Effort Ribbon woman are in the southwest.
Note — FireRed and LeafGreen: Kanto has fewer clean pools. Tentacool is the whole surf pool on Routes 19, 20 and 21 (Sp. Def), and Tangela is the whole Route 21 grass (Defense). Zubat is 69% of Mt. Moon 1F (Speed); the Geodude beside it pays Defense. Rock Tunnel is too mixed to recommend.
Generation 4 — Diamond, Pearl, Platinum, HeartGold, SoulSilver
Generation 4 adds the Power items — Power Weight and its five siblings, bought for 16 BP each at the Battle Frontier — which is what turns Sinnoh from "a place with good pools" into the first generation where a full 252 spread is an evening rather than a weekend.
| Stat | Where | Fight | EVs each |
|---|---|---|---|
| HP | Great Marsh — Surf | Wooper | +1 |
| Marill | +2 | ||
| Attack | Lake Verity — Super Rod | Gyarados | +2 |
| Seaking | +2 | ||
| Lake Valor — Super Rod | Gyarados | +2 | |
| Seaking | +2 | ||
| Lake Acuity — Super Rod | Gyarados | +2 | |
| Seaking | +2 | ||
| Defense | Iron Island — caves | Geodude | +1 |
| Graveler | +2 | ||
| Onix | +1 | ||
| Sp. Atk | Celestic Town — Surf | Psyduck | +1 |
| Golduck | +2 | ||
| Eterna City — Surf | Psyduck | +1 | |
| Golduck | +2 | ||
| Lake Acuity — Surf | Psyduck | +1 | |
| Golduck | +2 | ||
| Sp. Def | Route 223 — Surf | Tentacruel | +2 |
| Mantyke | +1 | ||
| Sunyshore City — Surf | Tentacruel | +2 | |
| Mantyke | +1 | ||
| Speed | Route 227 — Surf | Poliwhirl | +2 |
| Poliwag | +1 | ||
| Route 228 — Surf | Poliwhirl | +2 | |
| Poliwag | +1 |
| Stat | Tip |
|---|---|
| HP | The Marsh runs on a step counter, so it suits a burst rather than a marathon |
| Attack | The whole Super Rod pool |
| Defense | Zubat is the only leak |
| Sp. Def | Pelipper mixes in 2 Defense |
Generation 5 — Black, White, Black 2, White 2
Unova is the generation of feathers: Wings picked up on the Driftveil Drawbridge and Marvelous Bridge give +1 EV each with no 100-EV ceiling, so they finish a spread the vitamins cannot. The wild pools below are the fastest way to start one.
| Stat | Where | Fight | EVs each |
|---|---|---|---|
| HP | Moor of Icirrus — Surf | Stunfisk | +2 |
| Route 8 — Surf | Stunfisk | +2 | |
| Palpitoad | +2 | ||
| Attack | Dragonspiral Tower — floors | Mienshao | +2 |
| Druddigon | +2 | ||
| Tranquill | +2 | ||
| Defense | Clay Tunnel — caves | Durant | +2 |
| Onix | +1 | ||
| Lairon | +2 | ||
| Twist Mountain — caves | Durant | +2 | |
| Onix | +1 | ||
| Sp. Atk | Celestial Tower — floors 1–4 | Litwick | +1 |
| Elgyem | +1 | ||
| Sp. Def | Seaside Cave — Surf | Frillish | +1 |
| Jellicent | +2 | ||
| Seel | +1 | ||
| Speed | Route 1 — Surf | Basculin | +2 |
| Dragonspiral Tower — Surf | Basculin | +2 |
| Stat | Tip |
|---|---|
| HP | The surf pool trains nothing else |
| Attack | Most of the tower trains Attack; Audino, Emolga and the Vanillite line are the leaks |
| Defense | Excadrill leaks 2 Attack, so lead with a Repel above its level |
| Speed | Basculin is the entire surf pool |
Generation 6 — X, Y, Omega Ruby, Alpha Sapphire
Generation 6 is the fastest of them all, because of hordes: five wild Pokémon at once, each paying its full EV yield. A Sweet Scent lure plus a Macho Brace turns one horde into twenty EVs, and one Pokérus-infected horde run fills 252 in a couple of minutes. X and Y also add Super Training, whose punching bags are a slower but battle-free alternative.
| Stat | Where | Fight | EVs each |
|---|---|---|---|
| HP | Connecting Cave — horde | Whismur | +1 |
| Attack | Route 19 — horde | Weepinbell | +2 |
| Defense | Terminus Cave — horde | Durant | +2 |
| Sp. Atk | Frost Cavern — horde | Vanillite | +1 |
| Sp. Def | Reflection Cave — horde | Mime Jr. | +1 |
| Speed | Route 15 — horde | Murkrow | +1 |
| Stat | Tip |
|---|---|
| HP | A full horde pays 5 |
| Attack | A full horde pays 10 |
| Defense | A full horde pays 10 |
| Sp. Atk | A full horde pays 5 |
| Sp. Def | A full horde pays 5 |
| Speed | A full horde pays 5 |
Generation 7 — Sun, Moon, Ultra Sun, Ultra Moon
Alola breaks the pattern: its routes mix stats far more than Hoenn or Unova, and the two best tools are not battles at all. Poké Pelago’s Isle Evelup trains a chosen stat on up to 18 Pokémon at once while you play something else, and an SOS chain — an Adrenaline Orb plus a weakened wild Pokémon calling its own kind — turns one encounter into an unlimited run of identical, and therefore perfectly pure, opponents.
| Stat | Where | Fight | EVs each |
|---|---|---|---|
| HP | Paniola Town — Surf | Barboach | +1 |
| Attack | Route 11 — grass | Komala | +2 |
| Ariados | +2 | ||
| Trumbeak | +2 | ||
| Defense | Blush Mountain — grass | Torkoal | +2 |
| Charjabug | +2 | ||
| Turtonator | +2 | ||
| Sp. Atk | Memorial Hill — grass | Gastly | +1 |
| Sp. Def | Dividing Peak Tunnel — Surf | Kecleon | +1 |
| Speed | Route 10 — Surf | Fearow | +2 |
| Stat | Tip |
|---|---|
| HP | Chinchou pays the same in the Akala Outskirts water in Ultra Sun and Ultra Moon; Magikarp shares both and leaks Speed |
| Defense | Mudbray leaks 1 Attack |
| Sp. Atk | Half the grass; Seaward Cave pays the same through Psyduck, and through Smoochum in Ultra Sun and Ultra Moon |
| Sp. Def | The only thing in the water |
Generation 8 — Sword, Shield, Brilliant Diamond, Shining Pearl
In Sword and Shield the wild is the slow option. Vitamins lost their 100-EV ceiling, so 26 of them fill a stat outright, and Poké Jobs at any Pokémon Center train a chosen stat by the clock — send a box off for a day and it comes back trained. The routes below still matter when money is short.
| Stat | Where | Fight | EVs each |
|---|---|---|---|
| HP | Slumbering Weald — Surf | Whiscash | +2 |
| Barboach | +1 | ||
| Attack | Motostoke Outskirts — grass | Croagunk | +1 |
| Scraggy | +1 | ||
| Pawniard | +1 | ||
| Defense | Route 6 — grass | Silicobra | +1 |
| Durant | +2 | ||
| Hippopotas | +1 | ||
| Sp. Atk | Route 10 — grass | Vanillish | +2 |
| Sp. Def | Route 5 — grass | Dottler | +2 |
| Lombre | +2 | ||
| Speed | Route 2 — Surf | Arrokuda | +1 |
| Barraskewda | +2 |
Generation 9 — Scarlet and Violet
Paldea keeps Generation 8’s uncapped vitamins, sells them cheaply once you have the League badges, and adds Mochi — Health Mochi, Muscle Mochi and their four siblings each give +10 EVs from the Kitakami festival stalls. For the wild half, "Let’s Go" auto-battles are the point: throw your lead into a cluster of one species and it clears them without a single battle screen.
| Stat | Where | Fight | EVs each |
|---|---|---|---|
| HP | South Province (Area Two) | Jigglypuff | +2 |
| Igglybuff | +1 | ||
| Attack | North Province (Area Two) | Lokix | +2 |
| Scyther | +1 | ||
| Kricketune | +2 | ||
| Defense | South Province (Area Five) | Bronzor | +1 |
| Sp. Atk | North Province (Area One) | Haunter | +2 |
| Sp. Def | Asado Desert | Flabébé | +1 |
| Floette | +2 | ||
| Speed | North Province (Area Three) | Jumpluff | +3 |
| Pawmo | +2 |
| Stat | Tip |
|---|---|
| HP | The meadow above Cortondo |
| Attack | The bamboo grove |
| Defense | The ruins, where Bronzor is most of the spawn table |
| Sp. Atk | The ruins, at night |
| Sp. Def | The flower fields on its edge |
| Speed | Jumpluff is the single richest Speed target in the game |
How to reset EVs: undoing a mistake
From Emerald onwards, EVs collected by accident are not permanent: six berries each lower one stat’s EVs and raise friendship while they do it. In Emerald each berry removes exactly 10, down to 0 — there is no shortcut for a stat above 100, so clearing a full 255 takes 26 berries. Ruby and Sapphire have the same berries but cannot use them on a Pokémon at all, so in those two games an EV mistake cannot be undone — plan the spread before you start.
| Berry | Lowers |
|---|---|
| Pomeg Berry | HP |
| Kelpsy Berry | Attack |
| Qualot Berry | Defense |
| Hondew Berry | Sp. Atk |
| Grepa Berry | Sp. Def |
| Tamato Berry | Speed |
Note — See the numbers before you commit: The stat calculator turns a planned spread into the stats it actually produces — put in the level, the nature and the EVs you intend to farm, and check the payoff is worth the afternoon before you start.
EV training: quick answers
- How many EVs can one Pokémon have?
- 510 in total, and at most 252 usable in any single stat. That is two maxed stats plus six spare EVs — never three.
- How many EVs does a Pokémon give when defeated?
- Between 1 and 3, in one to three stats, fixed per species. Every Pokédex page on PokéMaps prints the exact yield under its base-stat bars — Marill gives 2 HP, Gyarados gives 2 Attack.
- How many Pokémon do I need to defeat for 252 EVs?
- Divide 252 by what one defeat gives. A Pokémon worth 2 EVs takes 126 defeats with nothing held, 63 with the Macho Brace, and 32 with the Macho Brace and Pokérus together.
- At what level should I EV train?
- Any level — EVs are stored as they are earned and applied at every level-up. Only their visible effect scales with level, so training a level 5 Pokémon works exactly as well as training a level 90 one; the stats simply show up later. The exception is level 100 in Ruby, Sapphire and Emerald: a Pokémon there earns no EVs from battles at all, so finish its training first.
- Do Effort Values exist in Pokémon Red, Blue and Yellow?
- No. Generations 1 and 2 use Stat Experience, which has no 510 budget and lets a single Pokémon max every stat. EVs as described here start with Ruby and Sapphire.
- Does the Exp. Share spread EVs too?
- Yes. In Ruby, Sapphire and Emerald the holder receives the full EV yield of every defeated Pokémon even if it never battles, so it can train a weak Pokémon safely; a fainted or level-100 Pokémon gets no EVs. From Generation 6 every party member receives the full yield — switch it off when you are training a single Pokémon on a specific spread.